Your cart is currently empty!
hearts and laserbeams how to: repeat yourself, repeat yourself part 4!
part 4: check yourself before you wreck yourself!
ok so you’ve got your repeat pattern finished in either illustrator or photoshop – the most important thing comes next, making sure your repeat works! spoonflower’s a little spendy, so it would suck if you spent the money to get your fabric printed up and then got it in the mail all honked up with little chunks missing! in this last and final installment we’ll go over how to check your repeat and make sure it works and get that crap ordered!
(ps sorry for the delay in writing this part folks! i have a new on-site freelance gig going on right now so i need to rework how my blogging goes so i can keep you elbow deep in fresh posts!)
so let’s get to it!
photoshop instructions:
1) open the photoshop file we’ve been working with! first off we’re going to group your repeat’s layers together to make em easier to work with in checking your work.
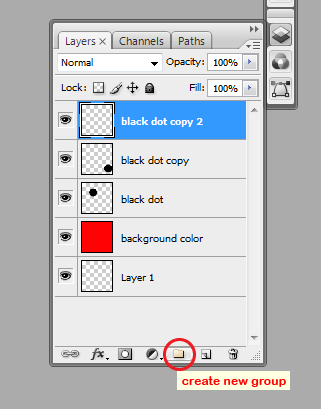
in your layers window, click on the create new group rear endon:
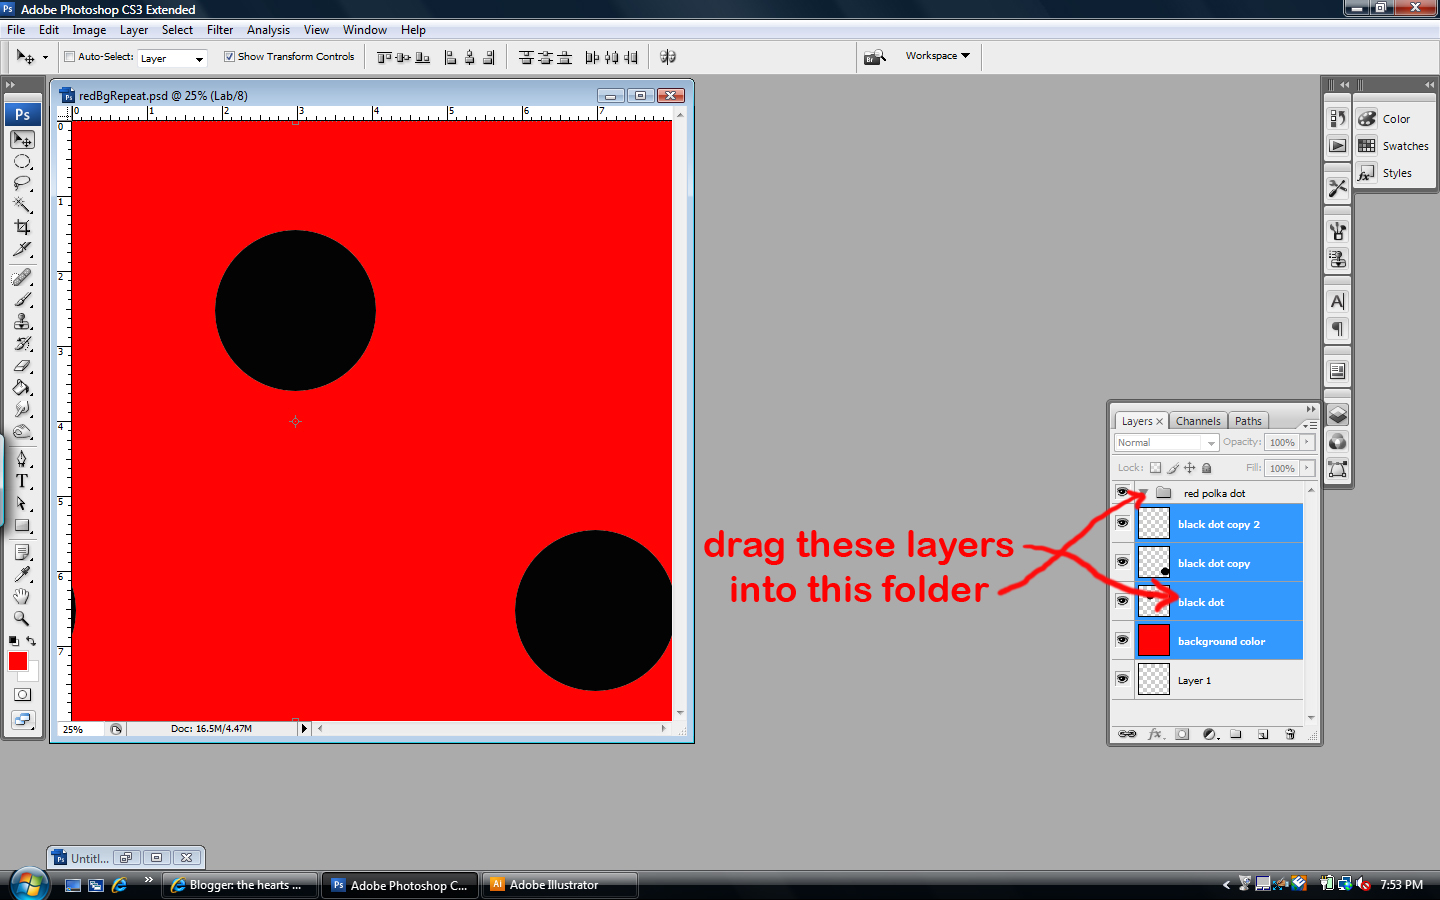
name this group “red polka dot”. click on your top (a polka dot) layer, hold down shift and click on your red background layer. you should see all of your repeat layers selected now – drag them into that group folder.
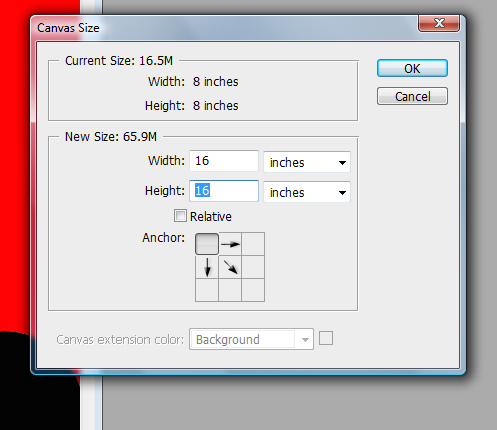
2) now we’ll make your canvas size a lot bigger so we can repeat this group and check to see if all the edges match up! using the menus up top, choose image > canvas size. enter 16 inches for both the x and y values, and then on the grid of squares click on the top left. click on ok.
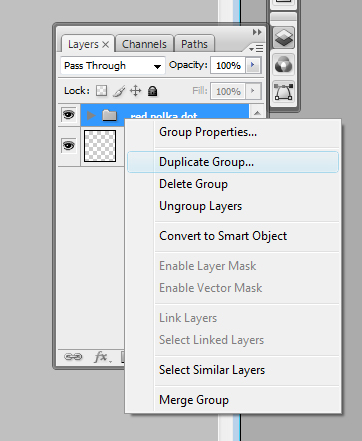
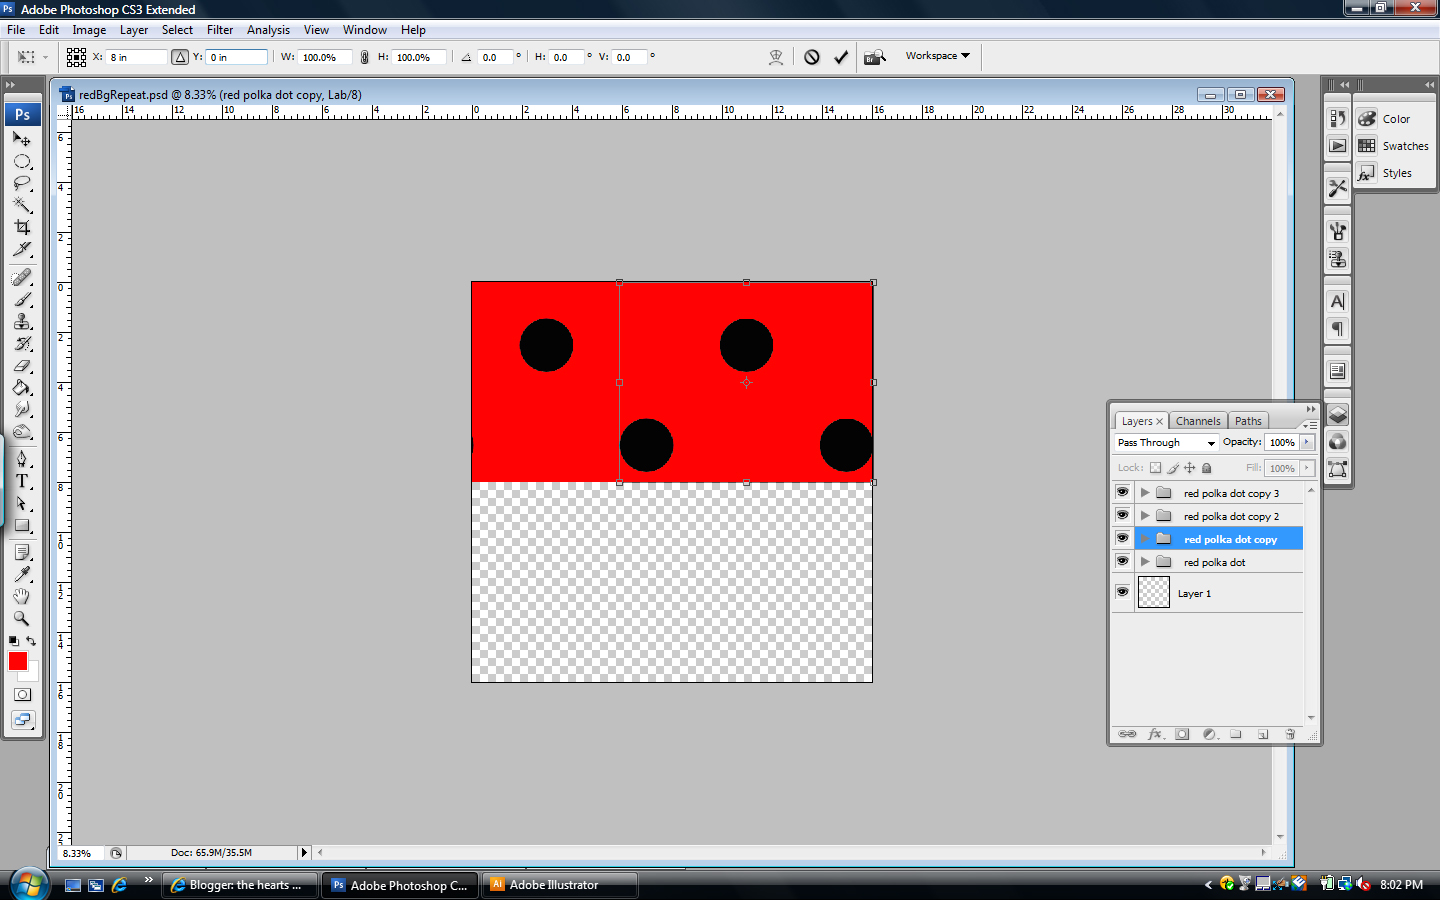
3) next make a copy of your polka dot group! right-click on your group, and choose duplicate group. do this 2 more times, so you have a total of four groups – your original, and 3 copies.
4) select one of those groups, and from the top menus choose edit > free transform. just like before, make sure the little triangle in the options bar up top is dark (click to make it dark if it isn’t), and then set the x value to 8 in and the y value to 0 in, then hit enter. one of your groups should have moved over!
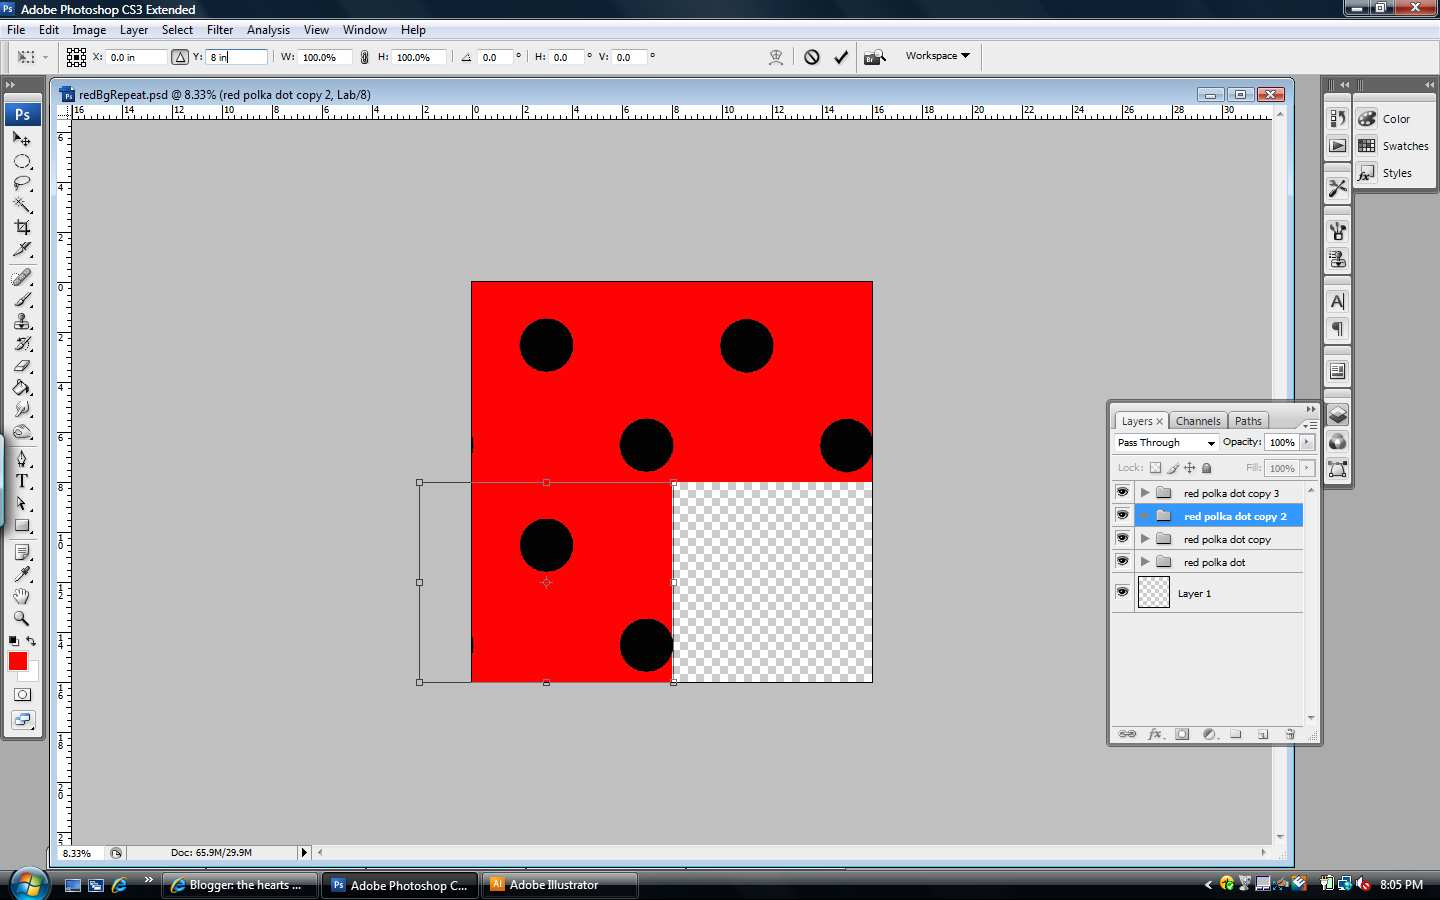
5) select another one of the groups, choose edit > free transform, set the x value to 0 in and the y value to 8 in, hit enter. another one moved!
6) select another one of the groups, choose edit > free transform, set the x value to 8 in and the y value to 8 in, hit enter. you should now have a block full of dots!
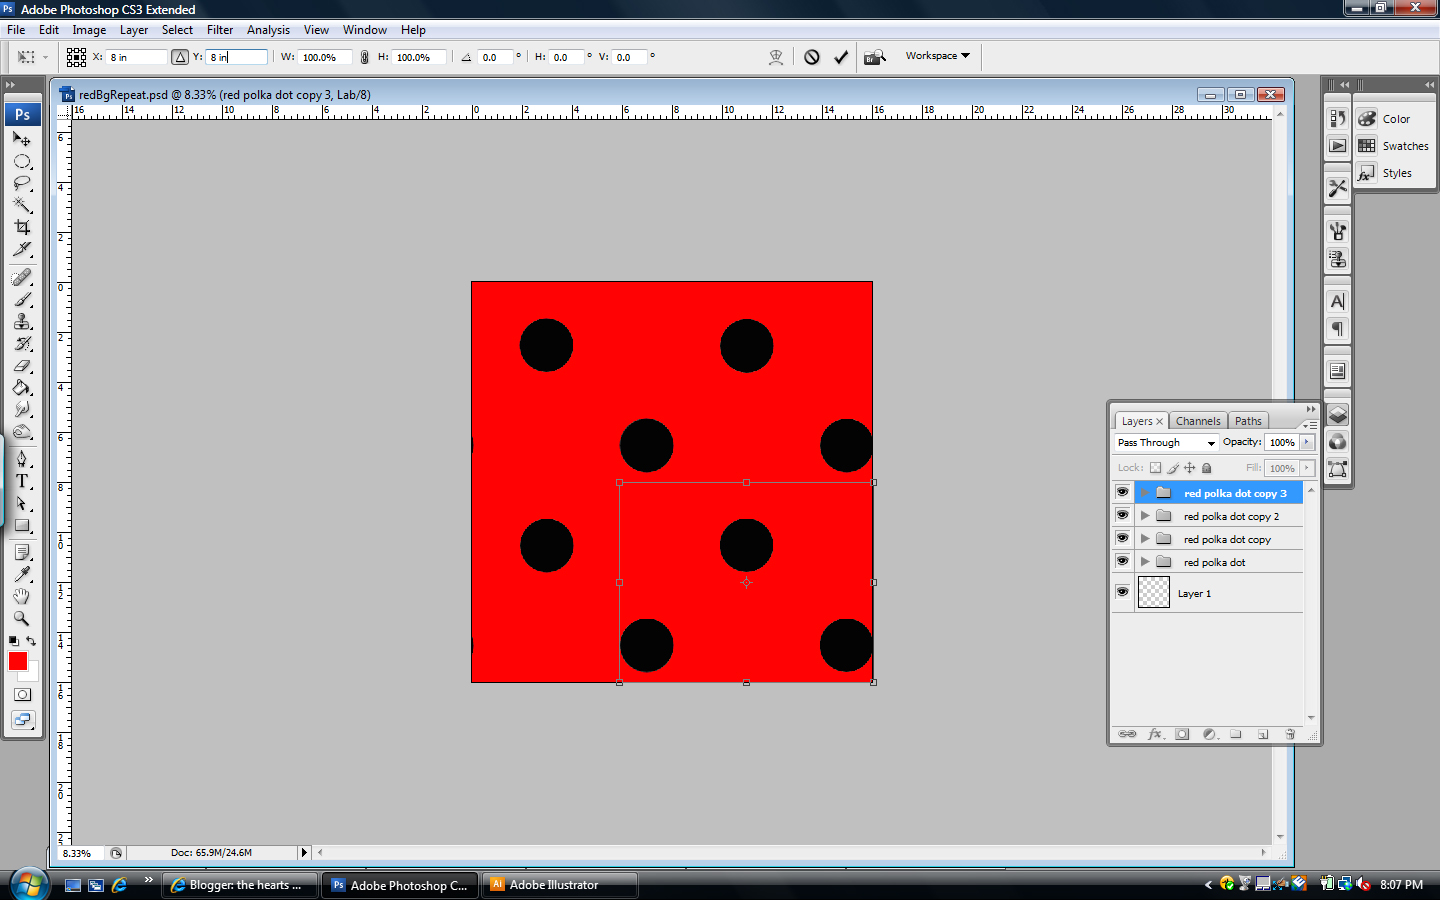
7) at this point you should check to make sure all your edges of your repeat matches up where everything hits everything else – if you’re doing a tossed pattern this is also a great time to check and make sure there’s no weird holes in your design! if there’s a problem you gotta go back and figure out what went wrong, but if everything looks good you’re golden and ready to set up your file to order!
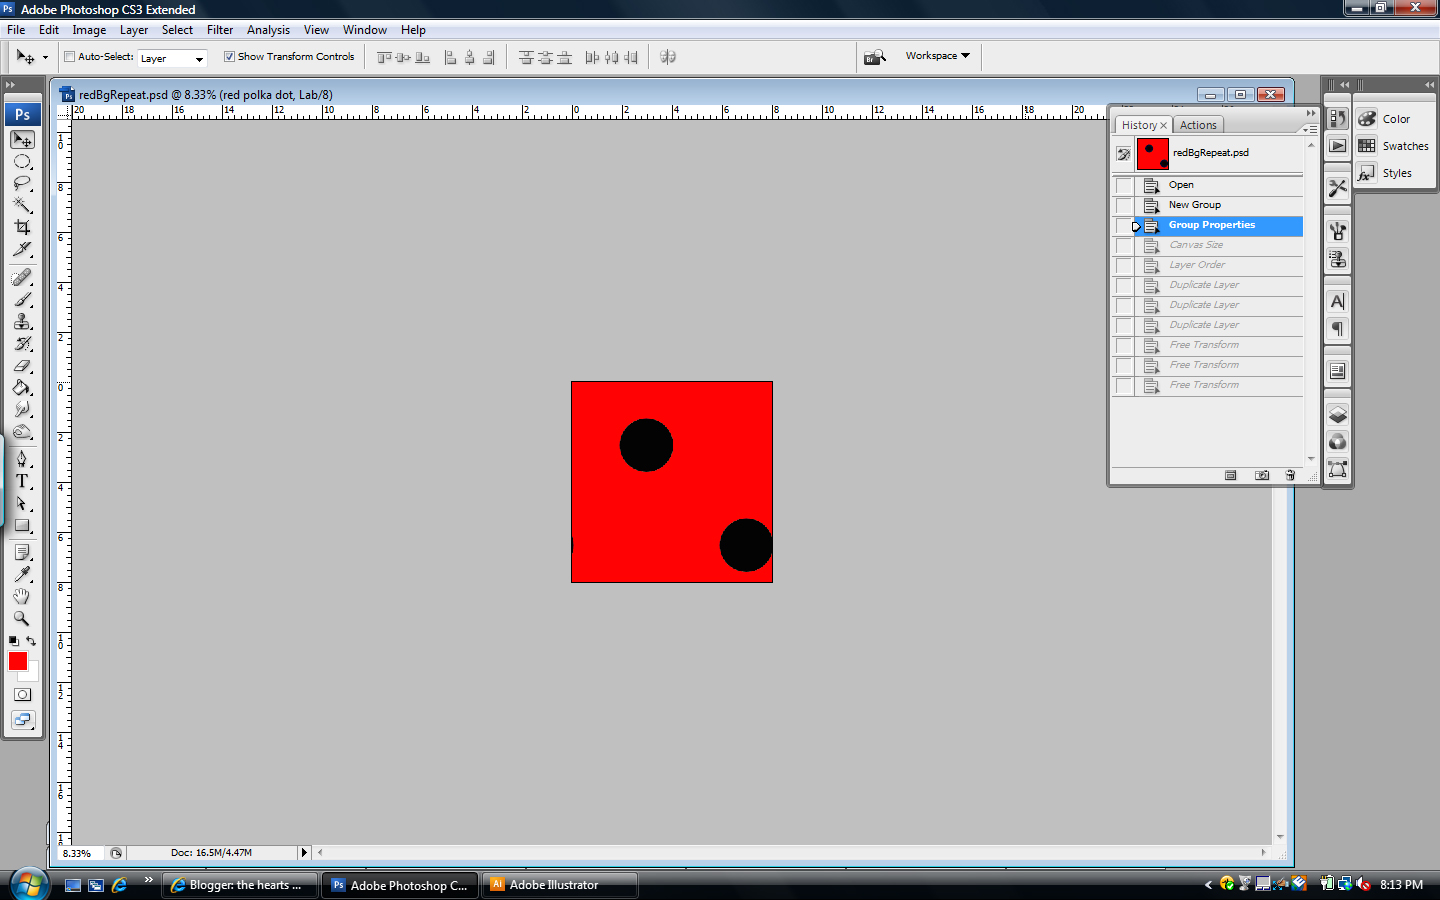
8) we’re gonna go back to your file before you made all those copies with the magic of the history window! using the menus up top, select windows > history. what you’ll see there is all the stuff you’ve done to this file for the last 10-15 steps! click on the item right before “canvas size”. (grouping is nice, so no need to undo that!)
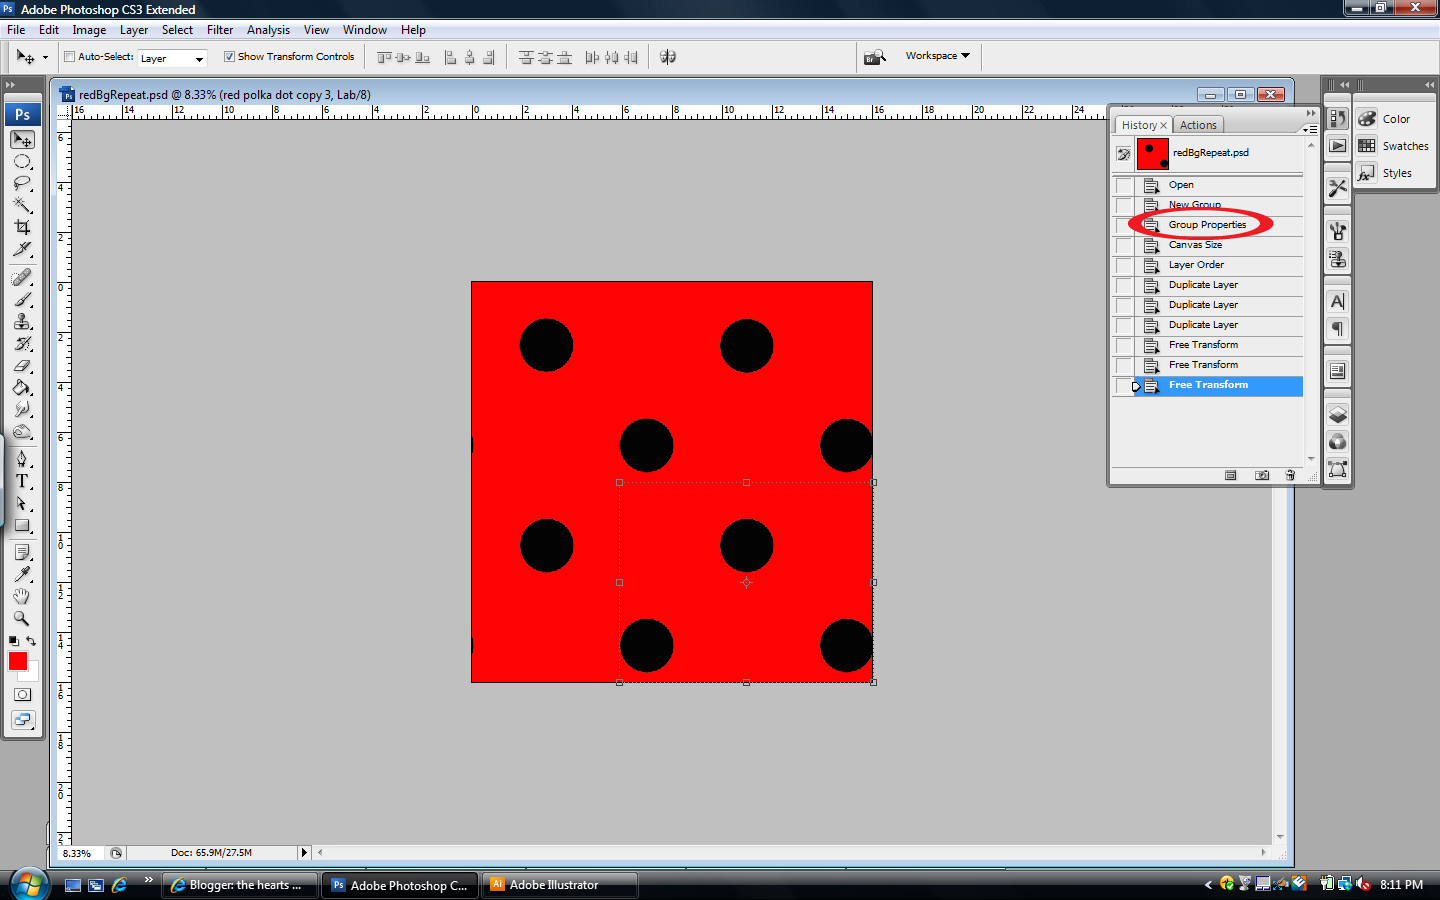
it should look like you’re back to where you started!
9) save that crap!
10) now we’ll save the file you’ll upload to spoonflower. from the top menues, select file > save as. set your format to tiff, and UNCHECK the box that says layers. (layers will make your file HUGE!!!) and click save! then click ok! then you’re almost done!
11) go to the folder where you saved your file and double check that it’s less than 25 megabytes – if it’s bigger than 25 megs and you’ve started with a file that’s in lab color and 300dpi, don’t fret! spoonflower’s printers print at 150dpi. if you’re having this problem, you can open your tiff file and go to image > image size. you can change the resolution to lower and lower increments to see how much smaller you can make the file, but DON’T GO BELOW 150 DPI!!!
AND THAT IS IT!! you’ve made a repeat in photoshop, saved the tiff and are ready to order from spoonflower! but what if you’ve created your file in illustrator?
illustrator instructions
(guess what, it takes a lot less work to check your file in illustrator!)
1) open the illustrator file you’re working with. with the dark arrow at the top of the tools window selected, click on the red background. using the menus up top, choose edit > copy and then edit > paste in back. WITHOUT DESELECTING THIS SQUARE, change the fill and stroke to have no color. you shouldn’t see any change on the screen because this square’s behind everything else on the page AND it’s color is essentially set to invisible!
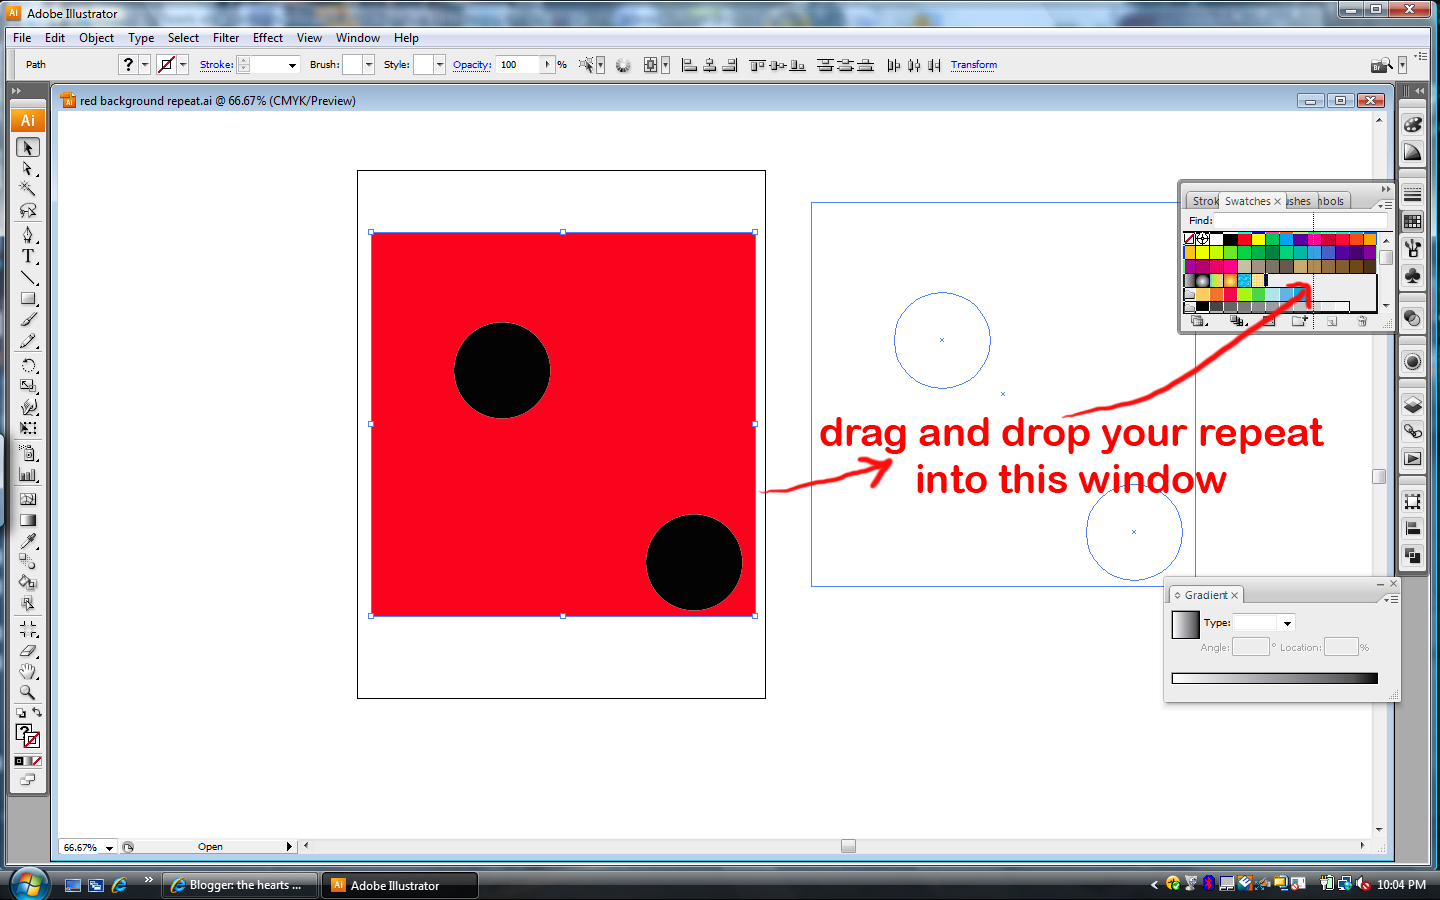
2) making sure your dark arrow at the top of the tools window is selected, drag a box around your entire repeat. using the menus up top, choose windows > swatches. drag your repeat into this window.
3) you should now see a tiny swatch of your repeat in this window! hooray! in the tools window, select the rectangle tool. make sure your repeat swatch is selected in the swatches window – off to the side of your file, click on the screen. you should get a dialog box asking for dimensions. set both the x and y values to 16 inches.
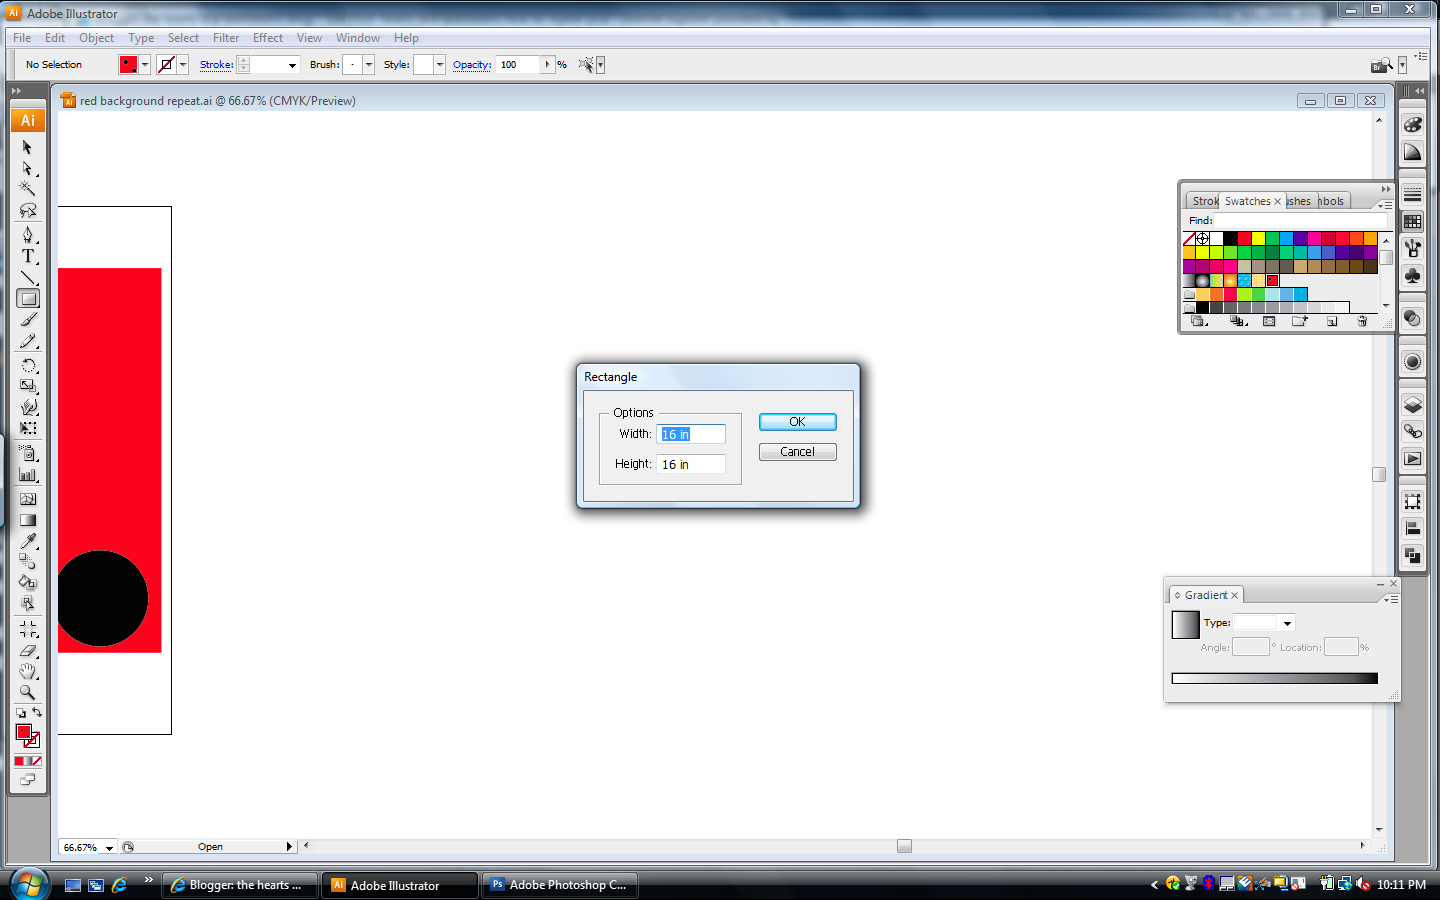
4) voila! you should see a big ol chunk of your repeat! make sure all your elements are intact and there’s no little chunks missing anywhere!

5) if it all looks good go ahead and delete that huge swatch so all you have left is your original repeat. looking at the menus up top, choose file > export. set where you’d like to save it and choose .tif for the file format, and hit ok. set the color to cmyk and the resolution to 300 dpi, make sure the box for anti-alias is checked and hit okay.
6) you’re not quite done yet! now you’re take this tiff and put it in the correct color format for spoonflower! it’s no worries, super easy peasy – go into photoshop, open the tiff you just saved from illustrator. using the up top menus, choose image > mode > lab color.
7) save it! done! finito! go to the folder where you saved your file and double check that it’s less than 25 megabytes – if it’s bigger than 25 megs and your tiff is in lab color and 300dpi, don’t fret! spoonflower’s printers print at 150dpi. if you’re having this problem, you can open your tiff file and go to image > image size. you can change the resolution to lower and lower increments to see how much smaller you can make the file, but DON’T GO BELOW 150 DPI!!!
AND THAT IS IT!! if you follow the four parts of this tutorial step by step you will be makin repeats like a madman in no time – hope they were super helpful to you; the next hearts and laserbeams how-to will be about creating animated gifs, wokka wokka doo doo yeah!


Freelance illustrator Steph Calvert is an award-winning artist with 24 years of experience working as a creative professional. She is based in McDonough, Georgia, just south of Atlanta.
Steph Calvert has expertise as a children’s book illustrator. She is an expert surface pattern designer for art licensing and creates line drawings for publishing and product design. Steph has years of additional expertise as a mural artist, creating original art, and logo design for small businesses. She is currently querying literary agents with her first author/illustrator book projects.
Writing CLIENTS INCLUDE
Moonfrye.com
OC Weekly
Educational Highlights
National SCBWI Conference, 2023
Illustration Summer Camp – The Highlights Foundation, 2021
Make Art That Sells, 2017
BFA in Computer Art – SCAD, 1999